Morning blogger friends.
Its time for my weekly slot for
This week I dont have a finished project to share but instead Ive made a little colouring tutorial using the image called "Vera".
You can find her in the STORE with all the other amazing stamps.
Ive used Promarkers to colour in Vera.
*****************
I tend to start with the hair when colouring in. I think I do this as I find it the hardest to colour so if I make a mistake and need to start over, I havent spent time colouring in the rest.
For the hair Ive used the following colours.
Tulip Yellow
Raw sienna
Gold
Raw sienna
Gold

Start by colour all the hair in Tulip Yellow.

Then comes what I find the hardest part.. The darkest shade. Ive used Raw sienna.
I add a little colour where I know the shades will fall. ie her shoulderand at the back of her neck.
To be honest, this ismage isnt too hard to colour as at the top of her hair, there are already lines to follow and that is where I added the dark colour.
I add a little colour where I know the shades will fall. ie her shoulderand at the back of her neck.
To be honest, this ismage isnt too hard to colour as at the top of her hair, there are already lines to follow and that is where I added the dark colour.

Next i go in with a middle colour. Gold.
I use the middle colour to blend the lightest and darkest colour together. I make the middle colour an extention of the dark colour. Meaning I go over where the dark colour is but extend the middle colour a bit further then the dark colour.
I use the middle colour to blend the lightest and darkest colour together. I make the middle colour an extention of the dark colour. Meaning I go over where the dark colour is but extend the middle colour a bit further then the dark colour.

Finish the hair with another coat of the lightest colour, Tulip yellow.
************
Ok next is the skin. The thing I find the hardest after the hair.
I admit I tend to stick to the same colour tones everytime, but its something Im trying to get better at.
I admit I tend to stick to the same colour tones everytime, but its something Im trying to get better at.
For the skin Ive used:
Ivory
Blush
Vanilla
Blush
Vanilla

Start by colouring ALL the skin (face, arms & legs) in with Ivory

Then just like with the hair, I go in with my darkest colour, Vanilla.
In this case I simply just followed the outline of the face.
The arms and legs, I followed the line of the inside of both the arms and legs.
In this case I simply just followed the outline of the face.
The arms and legs, I followed the line of the inside of both the arms and legs.
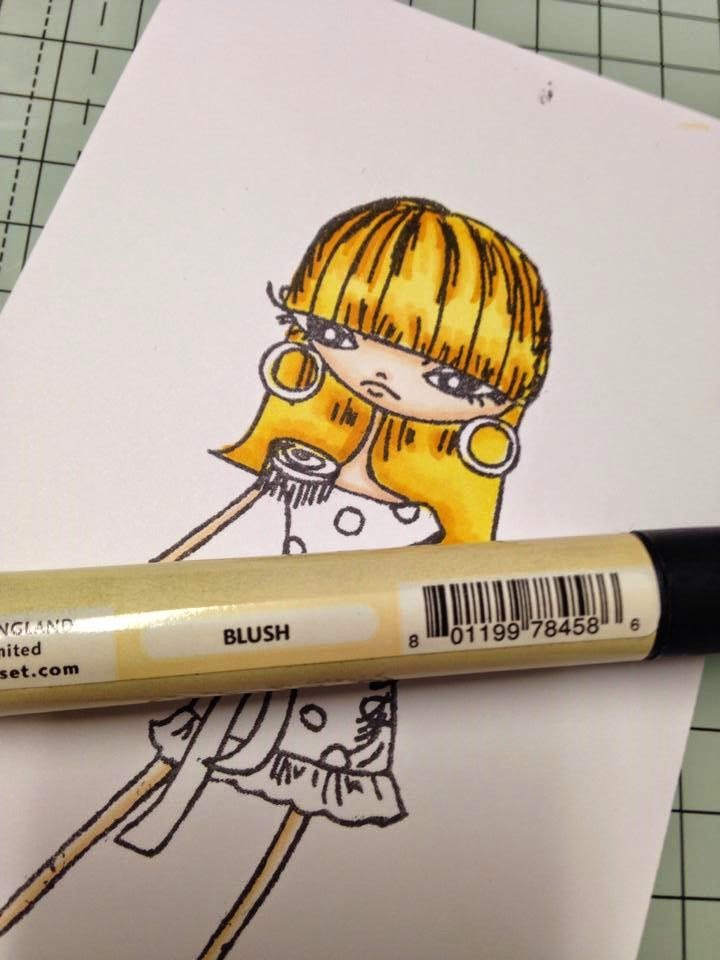
Then its time for the medium colour, Blush.
Just as before I simply followe the line of the dark colour with the medium colour to blend.
Then dont forget to finish with a coat of your lightes colour, Ivory over all the skin.
Just as before I simply followe the line of the dark colour with the medium colour to blend.
Then dont forget to finish with a coat of your lightes colour, Ivory over all the skin.

Then its time to finish the face with a few details.
I added a few dots with the fine nip of "Rose pink" to Vera's cheeks to give them a bit more life.
I added a few dots with the fine nip of "Rose pink" to Vera's cheeks to give them a bit more life.
Her eyes, I used the "Cobalt Blue" and just followed the outline of her iris' and went over with the blender pen to soften the line a bit.
Last in her face, her earings. I used the "Rose pink" again.
I coloured the whole earing in and then used my blender to remove a little of the colour to create the spots where the light hits. Ive done the same on her bracelet.
I coloured the whole earing in and then used my blender to remove a little of the colour to create the spots where the light hits. Ive done the same on her bracelet.
Voila, face and skin is done..
**************
Ok last, the dress..
Ive only used 2 colours for the dress as I wanted it quite light.
Ive used
Pink Mittens
Rose Pink.
Ive used
Pink Mittens
Rose Pink.

Colour the full dress in with the Pink mittens.

Then follow the out line of the dress and the shaddow lines with the Rose Pink.

Finish the dress with a coat of Pink mittens.

Her belt and her shoes I wanted to stay white. Well in order to make thing look white but with life in them, you need your light grey colours.
I used the "warm grey 1" with the normal nip to follow the lowest line of the belt. I then took my "warm grey 2" and used the fine nip and followed the same line (as close to the line as possible)
Finish of with a coat of the blender pen.
I used the "warm grey 1" with the normal nip to follow the lowest line of the belt. I then took my "warm grey 2" and used the fine nip and followed the same line (as close to the line as possible)
Finish of with a coat of the blender pen.
I did the same with the dots on her dress.
************
Ok nearly there now.. 1 last thing..
To give the image a bit of debth you need to outline your image.

The easist way to give your image debth is to simply take your "warm grey 1" and just follow the line of the image. I noramlly run over the line with the blender pen after but havent done it here as it would be hard to see on the picture.
Here is the finished result.

I hope you found this picture tutorial helpful.
Many thanks for popping by and for any comments left behind.
Many thanks for popping by and for any comments left behind.

Thanks for a great tutorial, I to have trouble with skin tones but will try your colours.hugs Jennifer xx
ReplyDeleteGreat tutorial Marleen.
ReplyDeletehugs
Linda xxx
Hi Marleen thank you for the tutorial. Hugs Jackie
ReplyDeleteFabulous, great step by step x
ReplyDeletehugs
Sandie x
great tutorial ,i need more colours ithink x
ReplyDelete