Showing posts with label Lustre Luxe. Show all posts

Wednesday, 18 April 2018

BeeCrafty - Scenery Animals - Hochanda Samples

Hello fellow bloggers..

Did you catch Bev on the tellybox this monday?? She brought some brand new stamps to Hochanda.. And they are AMAZING.. Another series to my favorite list lol.. Anyway.. they are called scenery animals and you can find them HERE in the STORE with all the other amazing goodies..

Here are the samples I made for the show:

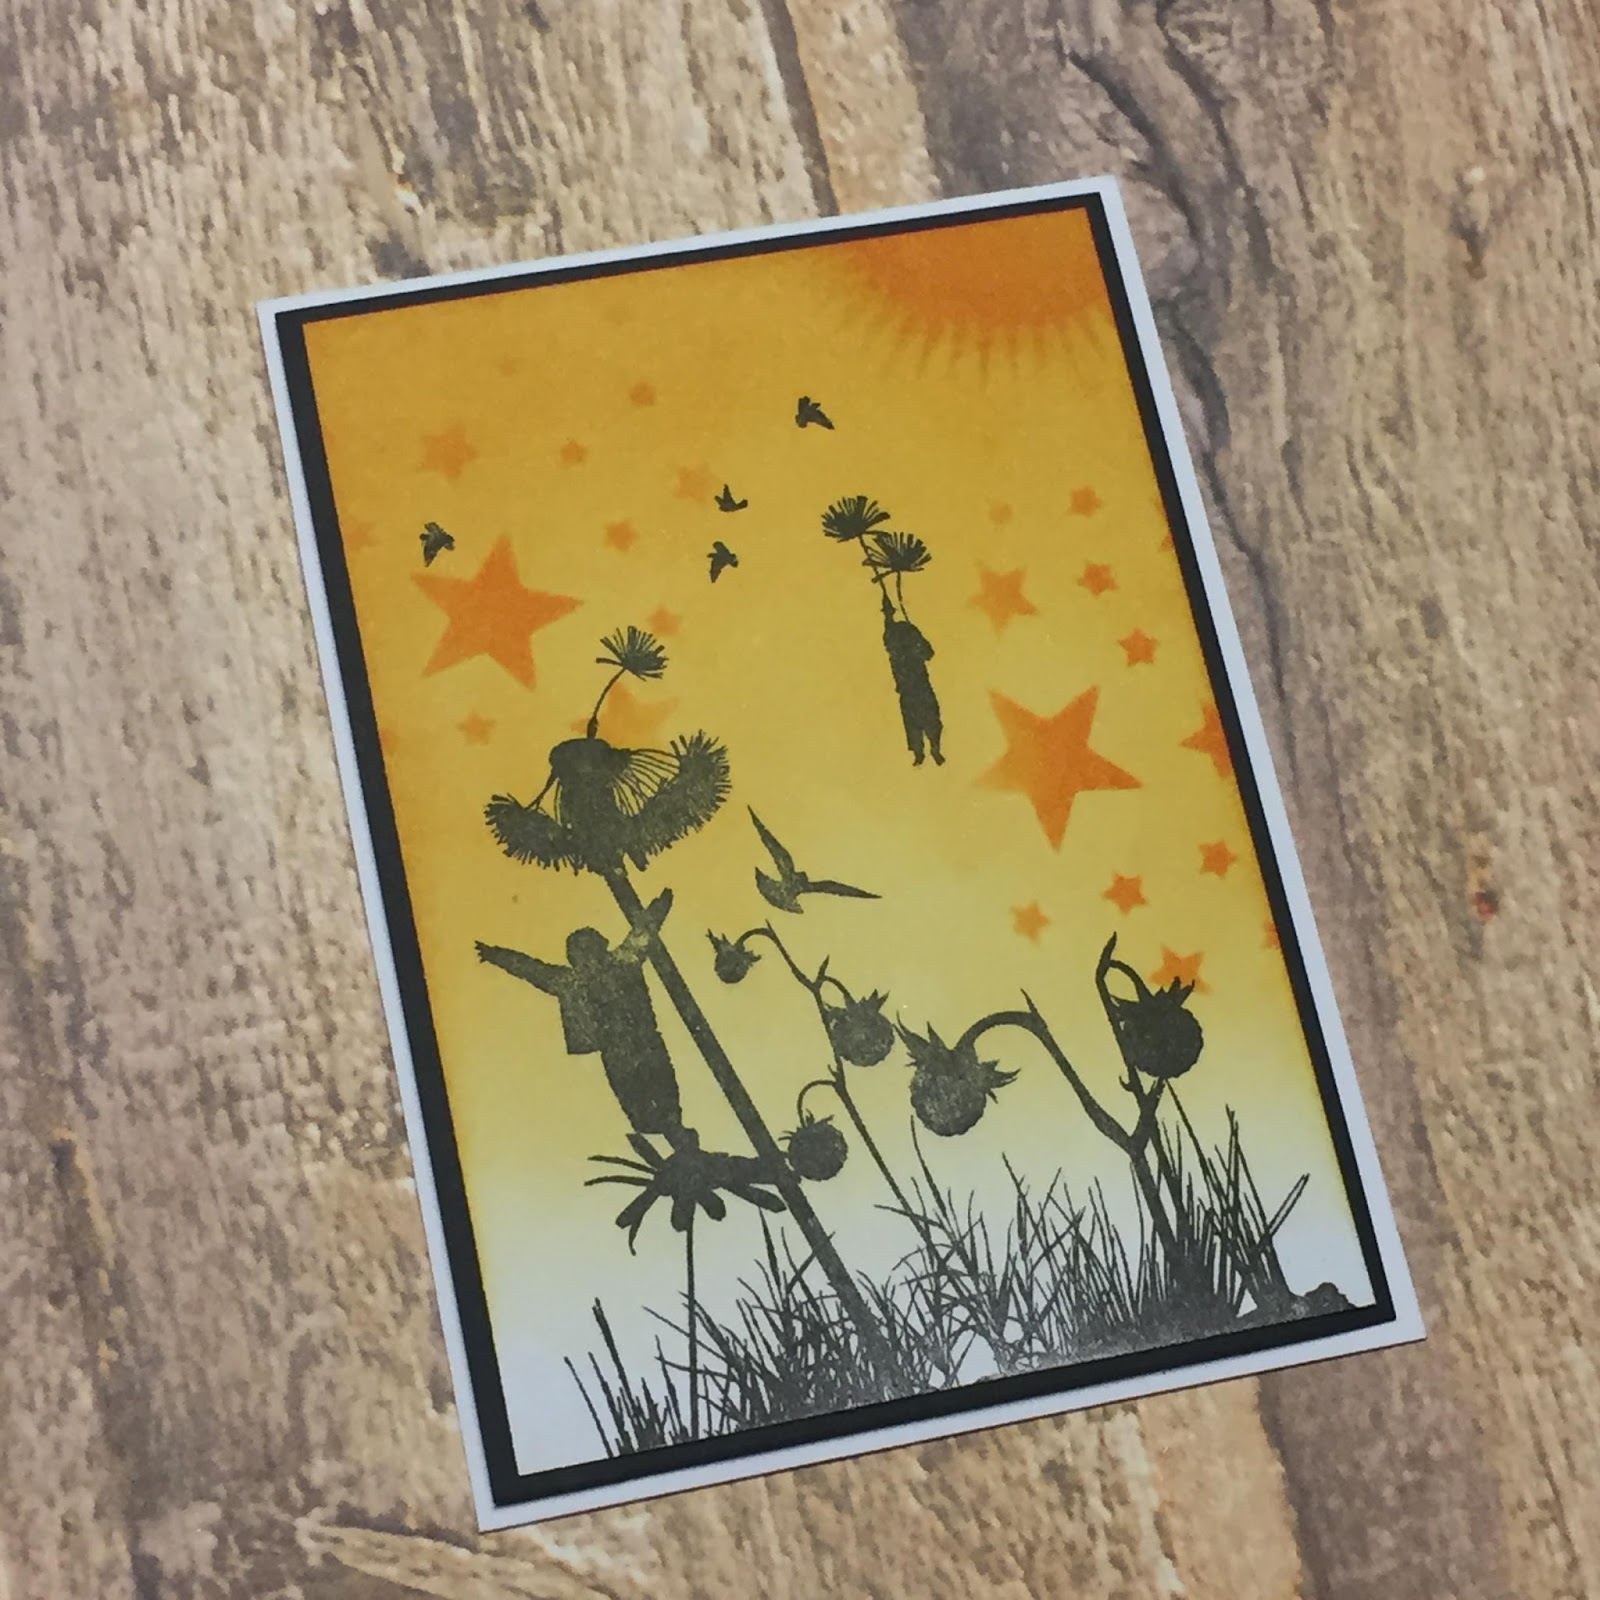
This one is made with distress oxide ink and just plain black stamping. I used the sun dinkable to add a bit of debth up in the corner.


 This one is muddled distress ink, stamping woth distress ink and gold embossing powder..


 I love using smaller stamps to make backgrounds and thats how I made this background. My Zebra is stamped on top of a watercolour background.


 For this one I cut a circle shaped card and stamped the world map with greens and brown distress ink. I then just stamped my animals over. I used a dinkable to add a bit if dimention.


 This one was me just having a play and liking the outcome.. The background has been made using some old spray inks, then using the inny of the circle easy frame I swiped my versamark pad around it and added gold embossing powder. Using the outie easyframe I then finished by stamping my animals.

Last but no means least, an MDF tag smothered with Lustre Luxe and stamped with gold embossing powder..
And that is it for today. Thank you for popping by and for any comments left behind.
Dont forget to come visit me on FaceBook, Twitter, Instagram, Pinterest, Youtube or my FB page.
 Happy Crafting

Wednesday, 4 April 2018

BeeCrafty Inspiration - MDF Tag

Hey Bloggers..

Just a quick post with a bit of inspiration for BeeCrafty..

For this weeks post I've made an MDF Tag.
I've also used a selection of stamps from the BeeCrafty STORE:
I started by adding the Lavender Quarts Lustre Luxe to my tag. I then added Purple Pearl Lustre Luxe through the Dinkable. I used archival ink to do all my stamping apart from my script stamp (which I just realised is very hard to see on the pic) with which I used Distress Oxide in Shaded Lilac.

And thats it really. It looks class but was really easy to make.
And that is it for today. Thank you for popping by and for any comments left behind.
Dont forget to come visit me on FaceBook, Twitter, Instagram, Pinterest, Youtube or my FB page.
 Happy Crafting

Wednesday, 28 March 2018

BeeCrafty, Wild Flower Hochanda Samples

Hey Bloggers..

Our Sam was on Hochanda yesterday with the Wild Flower stamp collection. The Bee's have added a few more stamps to this collection and its now only even better.

You can find them and all the other goodies in the BeeCrafty STORE.

Here are the samples I made for this show:
 This one is distress ink blended in a rainbow effect and then just plain stamping on top. I have cut up some of my greetings to I can use the words seperate from each other. If you dont want to cut up your stamps, just mask over the parts you dont want to ink, remove the mask and stamp :-)

 This art board, I cant take all the credit. It was inspired my my teamie Charlee. When these brick art boards landed Charlee was the first to add texture to hers. I absolutely loved her idea and admit I totally stole it.. I'll link to hers HERE so you can see the original idea.

Anyway.. I used a grit texture paste to create the texture, I just added a wee bit of paste to the bricks and once dry I used a mixture of Distress sprays and Lustre Luxe to get the background colours.

I stamped my WildFlower and heat set with black embossing powder and finished with a wee sentiment from the friendship collection.

 This one was really fun to make.. I started by stamping my moon and the flowers in Archival Ink. Just to make sure the stamping would stay put and not smudge when I added colour.

All my colours was added as sprays. I have several kinds of sprays from several companies, but my favorites are my Distress ones. I finised with a home made Lustre Luxe spray to add the top coat of shimmer..

 
 This one is Oxide inks. The yellows are added with the blending tool and I also used oxides to stamp the moon and flower. I finished by stamping my greeting wiht versafine black ink.

 An MDF tag. Went strait on with Oxide and once fully dry I stamped and heat set with black embossing powder. I added a few bats using the wee Dinkable and a black pen.

And last but not least.. Once again Oxide added with the blending tool in a faded effect. I stamped the moon in the same colour and  used the star Dinkable with a white gel pen. I also drew around the moon to male sure it realy stood out.. I finished by stamping a selection of the wild flowers.

And that is it for today. Thank you for popping by and for any comments left behind.
Dont forget to come visit me on FaceBook, Twitter, Instagram, Pinterest, Youtube or my FB page.
 Happy Crafting

Wednesday, 14 March 2018

Brand New Art Stamps from BeeCrafty..

Hello dear Blogger Friends..

Im late today with my post.. It dawned on me at 3.30pm today that it was wednesday and my turn to share for BeeCrafty.. And by then it was mummy duty.. Sooooo better late then never I suppose but I dont like messing things up..

Anyway.. Did you see Bev on Hochanda yesterday?? She had some brand new art stamps to show.. They are really amazing.. Very different, nothing like I've seen before..
They are really class so DO pop over in the STORE to have a nosy at them..

Sadly due to the snow and dear storm Emma, my stamps only landed the day before the show. Im used to having to work fast as I live in Ireland, (the rest of the team and the Bee's are in the UK), so delivery time and return time is longer for me, but this time not even my super speediest speed was gonna make it lol..
But I was still gonna have a play and I have made a couple of projects I want to share..

 This one is distress ink, more distress ink through a Dinkable and then just stamped the Art stamp and greeting strait on. Matted and layered and voila..
 This one is Lustre Luxe on a MDF tag. the more I play with these Lustre Luxe the better Im getting at blending them. They arent meant for blending as such so must admit Im loving the results im getting. Anyway, more Lustre through another Dinkable and then just stamping and black embossing powder..
 A very simple one this one is.. Just a fade of distress ink, distress ink through Dinkables and stamping..


This one is my favorite of the samples I made. I made a circle card and used distress ink to create the "sun" look. I think it looks a bit like a night sky. I was inspired by the stamp for this one. The fact that the stamp can be turned any direction you'd like, the circle card can also be turned as you wish..
I used Lustre Luxe through the Dinkables to get a bit of shimmer and shine..

And that is it for today. Thank you for popping by and for any comments left behind.
Dont forget to come visit me on FaceBook, Twitter, Instagram, Pinterest, Youtube or my FB page.
 Happy Crafting

Wednesday, 7 March 2018

BeeCrafty.. Ghetto Rat XL..

Hello Blogger Friends..

Time for me to share a bit of inspiration for
BeeCrafty..

For today I have 2 projects made with using the Ghetto Rat XL.
You can find him and all the other goodies in the BeeCrafty Online Store.

This one is an MDF tag with lots and lots of yummy Lustre Luxe. If you have visited my blog before you will know that I simply adore Lustre Luxe. I just love how smooth it comes on to just about any surface, the shimmer and not to mention the cover..
For this project I used 3 colours. Sea Green, Lavender Quartz and Moonstone. I added the green and purple strait onto the tag, no priming. I then stamped Mr Rat and heat set him with black embossing powder. Once cooled I used the "Chainlink" Dinkable and used the moonstone through it. I also used the "Star" Dinkable with some clear embossing past to add a bit more dimention.
I finished with the "Being Happy" Sentiment stamp, which I stamped and cut in half.

 
This one is an A5 water colour background. I stamped Mr Ghetto Rat  and heat set him with black embossing powder. I used a sparkle paste through the "Cracked glass" Dinkable and finished with the "Dreams come true" sentiment stamp , well a piece of it anyway lol.. 

And that is it for today. Thank you for popping by and for any comments left behind.
Dont forget to come visit me on FaceBook, Twitter, Instagram, Pinterest, Youtube or my FB page.
 Happy Crafting


Wednesday, 28 February 2018

BeeCrafty on Hochanda.. Banksy..

Hey Bloggers..

Sam from BeeCrafty was on Hochanda yesterday (Tuesday 27/02-2018) with some amazing goodies..
A huge selection of Banksy stamps, Background stamps, the Dinkables and some brand new MDF.

Sadly due to illness I had to sit this one out but as soon as I could drag myself out of bed I managed to get a few cards made and I thought I'd share some of them today.

 This one is made with a watercolour background, sparkle paste through the star Dinkable and using both sizes of the "Decision to try" stamp.

 This background is made with acrylic paint sprays, Sparkle paste, Lustre Luxe and the drop Dinkable. Sentiment "Dreams come true" is made the same way.

 
 This one is a Gelli plate background and then stamping with the Brick background stamp.
I used the "Girl watering Aerial" banksy stamp. The stamp was'nt wide enough to cover the bottom of my card so I inked up a bit of the base of the stamp and extended the "greenery". I finished again with the "Dreams come true" stamp.

 
Right last one for today.. This one is an A5 and the background is a "mop up" of Distress ink.
I used the Circle Inkable as well as the Heart Dinkable to create a bit of debth on my card. I once again used the "Dreams come true"sentiment and used the Banksy "Caught in the rain" stamp.
I extended some of the rain lines with a black pen as I wanted the girl and the sentiment to kind a flow together.
 
And that is it for today. Thank you for popping by and for any comments left behind.
Dont forget to come visit me on FaceBook, Twitter, Instagram, Pinterest, Youtube or my FB page.
 Happy Crafting


Wednesday, 14 February 2018

Hochanda Samples for BeeCrafty.

Hello Bloggers..

Once again my turn to share some inspiration for BeeCrafty and today I want to share my samples for the recent show on Hochanda.

Did you see the show?? Arent those goodies amazing??
We are history nuts in our house and the egyptian history is on top of the list here. My son (12) sat next to me when I made my samples and told me the meaning of all the symbols.

Anyway.. you can find all the goodies over in the BeeCrafty STORE so do pop over for a good nosy..

Here are my samples:
(I must appologise for the bad photoes. I had to take the pics late in the evening and lighting was terrible)

This one is distress ink and gold embossing powder. I then took the hieroglyphics strip stamp and stamped with versamark ink and added mica powder on top. Once the mica has been buffed a bit it shows when tipped in the light.

This one is Lustre Luxe on an MDF artboard. I stamped my background with distress oxide. (please note the oxide WILL dry on the Lustre BUT can be rubbed off with a bit of effort) all the other symbols I stamped in black Archival ink which will dry and stay put.
The little strip going across the artboard, is just a card strip with added Lustre Luxe. The symbols have been stamped on shrink plastic and shrunk. I got this idea from my teamie Alisa. You may have seen she is the queen of shrink plastic. She makes amazing jewelry using it. 

This one is made as the black one above. Gold embossing, distress ink and mica powder on top of versamark ink.

This one is my favorite I think. The background is made by repeatedly stamping the strip of hieroglyphics in distress ink and then covering the whole background in clear embossing powder. I did the same with the symbol stamp as well, only I fuzzy cut it before adding the powder. I made the mat and y sentiment also using distress ink so it all match in colour.

This one is very simple. Background is stamped with distress oxide ink and then simply stamped the bigger stamps in black on top.

This one is also l;ike that first one, the black one. Simple gold embossing powder and distress ink.

And that is it for today. Thank you for popping by and for any comments left behind.
Dont forget to come visit me on FaceBook, Twitter, Instagram, Pinterest, Youtube or my FB page.
 Happy Crafting

Wednesday, 7 February 2018

Lustre Luxe on glass!!

Hey Blogger Friends..

Wednesday again and my turn to share a bit of inspiration for 
 BeeCrafty.

Todays project is a bit of a test really.. And im not even sure Im finished with it yet..
The project came about as I had a conversation with a fellow Bee Fan, Jan. Jan is a good friend of mine and we were sitting one evening chatting about our beloved Lustre Luxe.. Jan said she had tried Lustre Luxe on glass.. Something I hadnt tried, so lo and behold I had to try it..

I used an old coffee jar, just washed and dried. I didnt prime it first but better results may happen if it was, something i must try also lol..


As I said above, this is Lustre Luxe strait onto the jar, no priming.. Now its easy enough to apply but it dont come on as smooth as it does on paper. On glass you tend to pull the Lustre back off again when going over it.. But on Jan's suggestion, I tried using more of a tapping motion then the usual sweeping motion and I found that it worked much better. Please remember that Lustre Luxe is not a product that is meant to blend as such so to get the colours blending, it take a bit of work.

Now as you can see, I also tried the Lustre through a couple of the Dinkables and it works fab. As the lustre is a bit thicker then paste its a perfect combination.
Now I must say, drying time is of Lustre Luxe is normally extremely fast, but on the glass it takes longer. Its wasnt till the next day that I felt the Lustre I put through the dinkable was truly dry but once dry, the Lustre stays put. You can of course scrape it off, but I have handled this jar many times since "painting" it and the Lustre hasnt budged.

Anyway this has been a really fun project to play with but if you want to know more about Lustre Luxe, head over to my youtube channel where I did a beginners guide to Lustre Luxe. Find it HERE.

And that is it for today. Thank you for popping by and for any comments left behind.
Dont forget to come visit me on FaceBook, Twitter, Instagram, Pinterest, Youtube or my FB page.
 Happy Crafting

Wednesday, 17 January 2018

BeeCrafty Inspiration - Lustre Luxe cards..

Hello Bloggers

Once again my turn to share a bit of inspiration for
BeeCrafty.

For today I have been playing with my Lustre Luxe. They are a constant fixture on my crafty table along side my inks. They are so versatile. They can be used for so many things. For today I have used them on 2 cards. I used them with the Easy Frames Inkable stencils. I love these basic shapes.


Both cards has been made the same way.

My backgrounds has been made by simply adding my stencil and adding lustre luxe through. I left each shape to dry for a few seconds before adding the next but Lustre Luxe drys very fast so it wasnt a problem.

I added my sentiments to a strip of black card stock and heatset it with silver embossing powder. I finished by matting and layering on black cardstock and a few gems on each and Voila..

And that is it for today. Thank you for popping by and for any comments left behind.
Dont forget to come visit me on FaceBook, Twitter, Instagram, Pinterest, Youtube or my FB page.
 Happy Crafting

Sunday, 7 January 2018

Art Journaling and a Lustre Luxe Tag..

Hey Bloggers
And Happy New Year to you all..
My first blog post of the year is for
BeeCrafty.

Over the holiday, I took a wee break from crafting as my mojo has been hiding for a while. In order to kick start the mojo a wee bit I decided to try out a bit of art journaling. Its not something I do often but I was inspired by my teamie Jane and her amazing art journaling.. Mine is only beginner pieces compared to Jane's so do pop over to see her amazing journal.

I started colouring the whole page with purple Lustre Luxe. I used the easy frame circle stencil as well as few of the Dinkables to add more colours of Lustre Luxe. For the 2 suns I added the Lustre Luxe with a wee spatula so its raised, just like using paste. For all the circles I just used blending foam.
And then it was really just doodling. I used a white gel pen as well as a black sharpie.
I did think of adding a greeting but decided just to leave it.. But you never know,  might go back to it lol...

Right, while I was playing I went for a second page. This one is using the circle wire style frames with Oxide inks. I also used the feather and the spotty Dinkable. I finished with the "Angry Bubbles" sentiment stamp.

Well that is really it for today, but before I go I want to share a few tips for using Lustre Luxe..
Let me post a few pics and I'll explain as we go..

I made these 2 little tags, but I didn't like the border I made down the bottom, but stamped with Archival ink, the ink was gonna come off.

So I decided to cover up the tag and start over.
1st coat of Lustre Luxe going on, already great cover..

2nd coat, only the black showing through..

 
And the full tag now covered.. It took 4 thin coats of Lustre Luxe to fully cover and no tag wasted..
Now.. Tip no 1:
Leave each coat to dry for a few mins. Lustre Luxe pretty much drys instantaneously but I find that if you leave it for a few minutes, the next coat goes on a bit smoother.

 Before and after..
After my tag was dry I used a shimmer spray made also from Lustre Luxe to add the gold shimmer and then the circle wire style frames with Oxide inks.
The shimmer spay is made by filling a mini mister with water (fillit only half way with luke warm water) and a wee lump of Lustre Luxe. Shake well.
Tip 2: Empty out your mini mister after use and clean mister well as I left mine and mister was all clogged up.
And that is it for today. Thank you for popping by and for any comments left behind.
Dont forget to come visit me on FaceBook, Twitter, Instagram, Pinterest, Youtube or my FB page.
 Happy Crafting